Tuesday, December 23, 2014

Santa Magic Tutorial

*photo credit Karen Rode Amerman*

It's almost Christmas, and all the little boys and girls are going to be peeking out the window to see if they can spot Santa's sleigh! But why not make it a little more magical for them, and have a picture where they actually do see Santa and his reindeer flying away? In this  tutorial, I will show you how to change your window into a magical Christmas scene
 And Sorry, I forgot to screen cap as I went along, so all of the layers are already present. But that might be helpful for you experienced photoshop users!


This is the scene we are going to add to the window. As you can see, it is a composite of several images: Moon, clouds, snow, spruce trees, and Santa. There are also a few sparkles painted in around the sleigh.

And here is a breakdown of the layers. I started with a layer of clouds(layers 1&copy), and duplicated the layer in  certain spots to add a little more color where I wanted it. I then added the moon overlay (layer 2) and blended it to screen mode, reducing the opacity slightly. Because blending a white moon can be a little  hard, I also put a white radial gradient behind it (layer 3). Next, I brought in my Santa image, which and also reduced the opacity slightly (layer 4). I also wanted to show a bit of a winter scene, so I added spruce trees, again with a screen blend and a layer mask to clean up any edges since it's a picture I took while Christmas tree hunting several years ago and there was a mountain in the background (layer 5).Then I added my snow, two of the same overlay, each with a mask to blend them together (layers 6 & copy). Lastly, I gave Santa's sleigh a few sparkles to imply magic :)


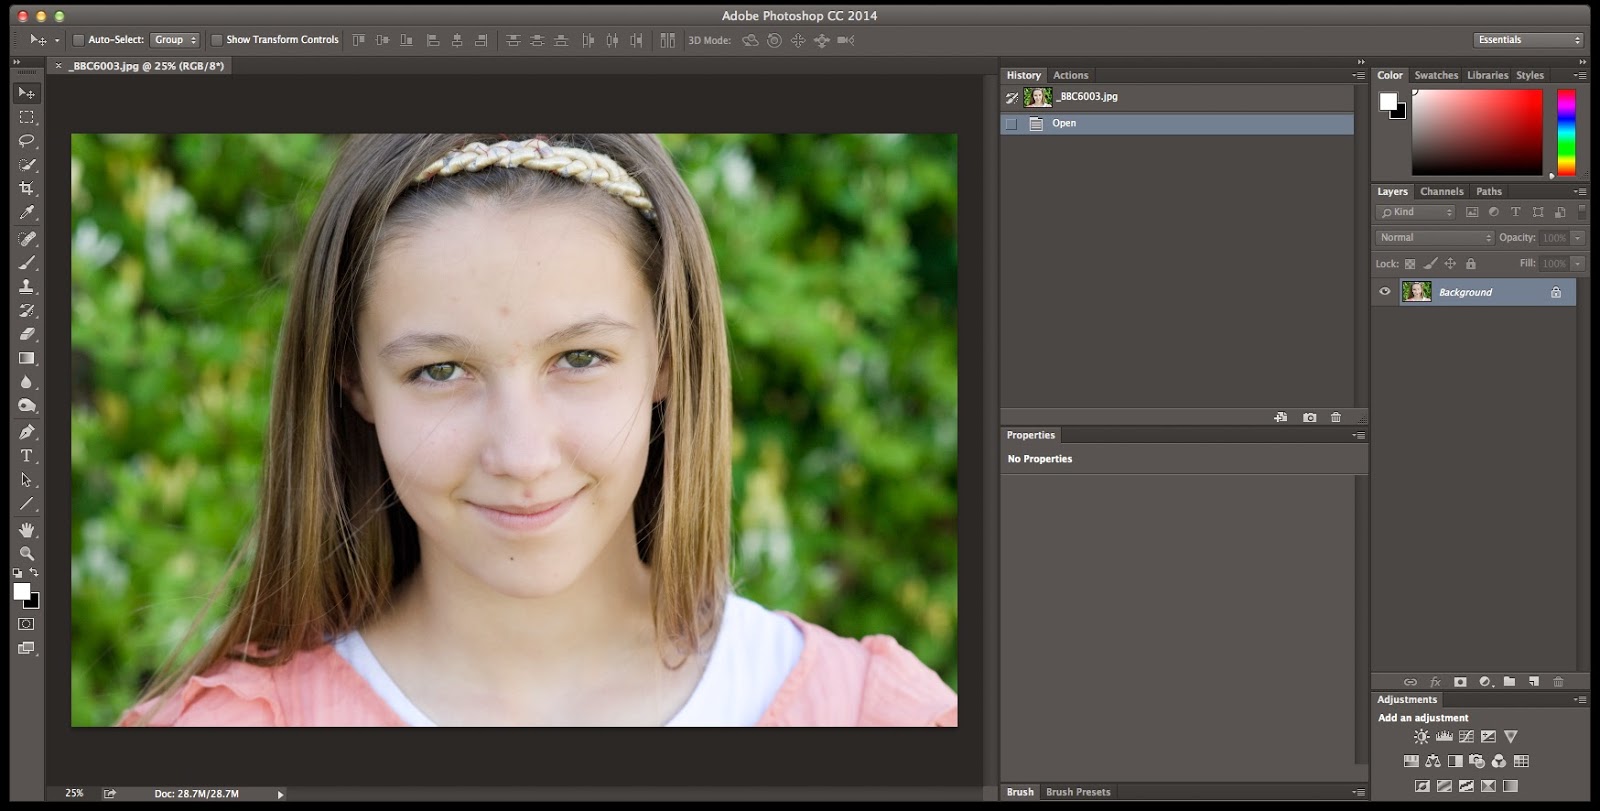
And here is the image we are going to be using. Ideally, it's best to underexpose a starting image like this to avoid harsh lighting on the child's face, which gives the illusion the scene is actually taking place at night.


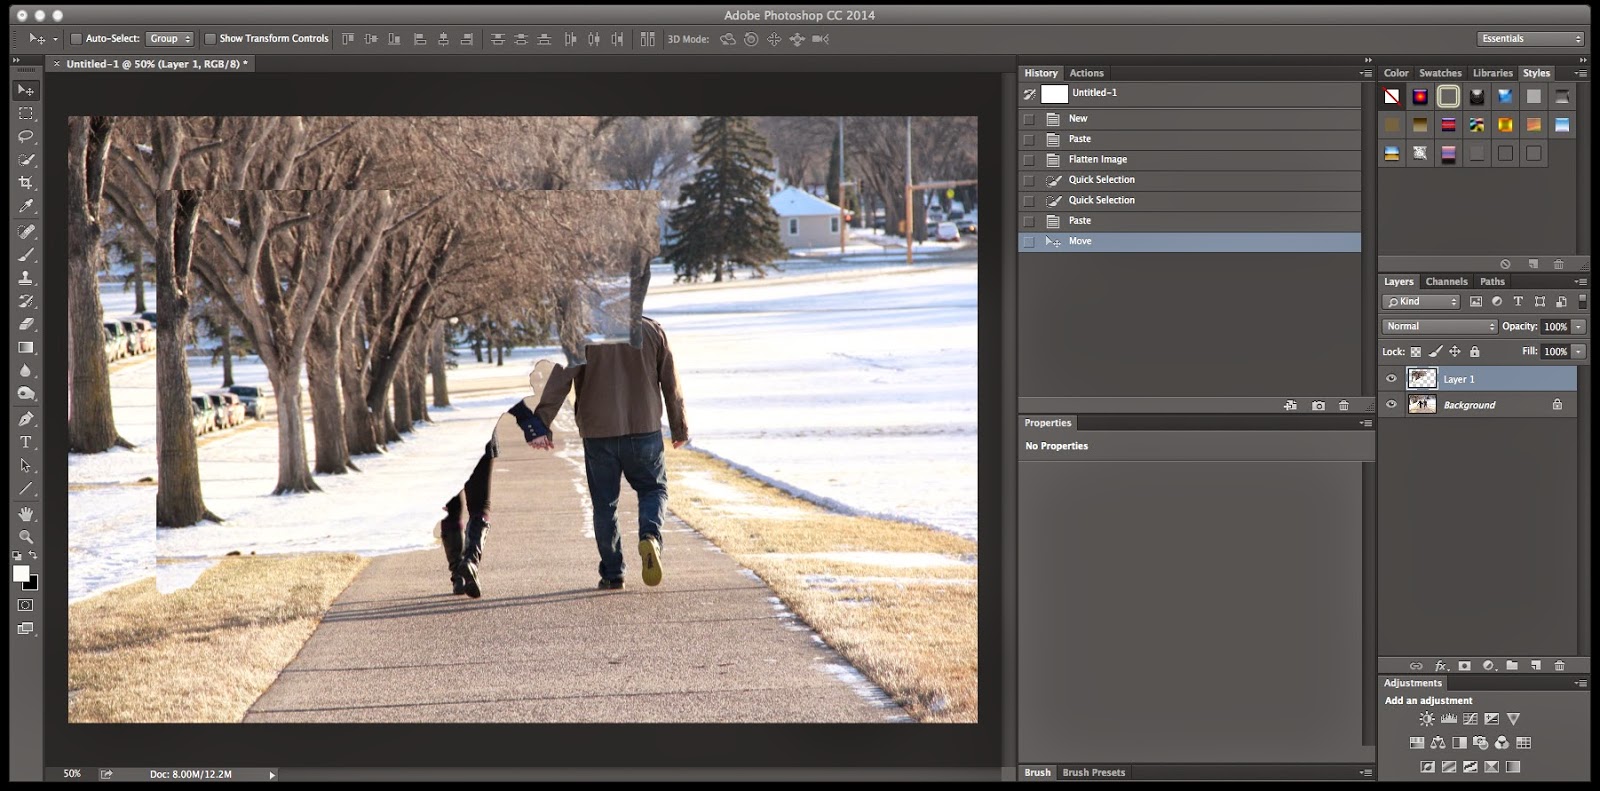
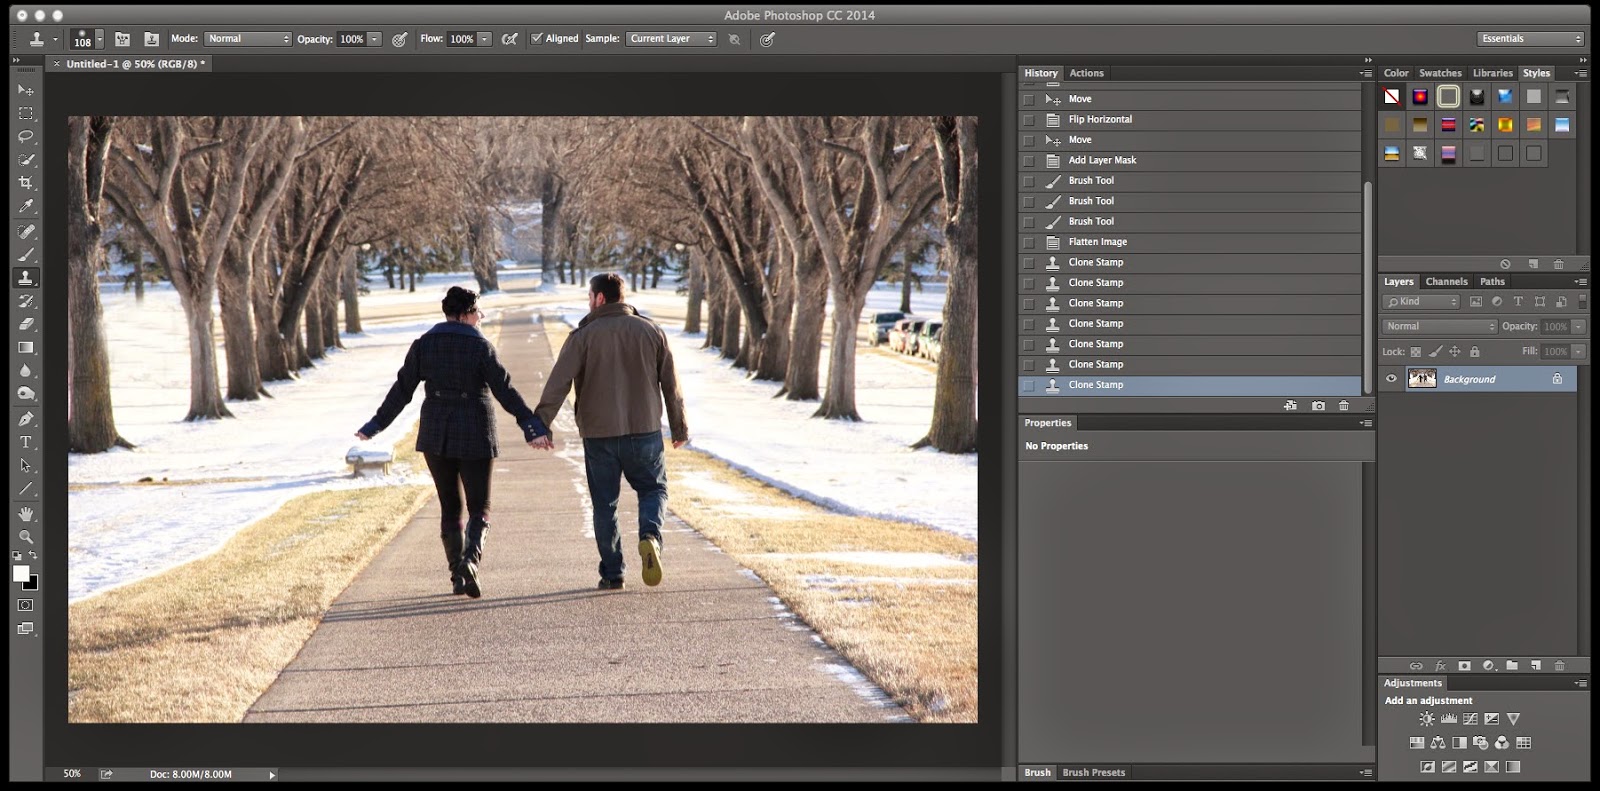
Again, sorry, I already did all the work, so bear with me. To give more space in the window, I got rid of the panes and outdoors until I was left with was the frame around the outside. I did this using the quick selection tool, the magic eraser and then the cloning tool to clean up  the frame. I also quick selected the boy's head and created a layer just for it, making sure to the refine the edge with a touch of feathering and keeping the radius set to smart. That way putting a scene behind his head would look more natural. Then, I imported my Santa scene into the image, put it behind the original image and the copied layer of the boy's head.


The finishing touches were just using the burn tool around the window sill to make it look more like nighttime, adding a photo filter to make it cooler and cleaning up the glare and halo around the boy's head by using a layer mask. I also ended up hating the way the moon stood out in front of the clouds, and cloned a few overtop with a darken blend.

And there you go! Santa magic in the window!


Another example using a starry night, which consists of a star image (exposure 30 seconds, f/4 ISO800), a cloudy sky image, the moon, and of course Santa!


Purchase either of these window overlays in my etsy store!


Monday, December 22, 2014

Cloning a Mirror Effect

*photo credit to Sierra Alizabeth Beard*

Using a cloning tool and mirror effect can seem hard. But! Here is a quick and, I will admit, a bit sloppy way to get it done. It works :)


Start out with you image, and decide on which portion you'd like to mirror. For this image, its going to be the trees on the left side.


Using the Quick Selection tool, highlight the area and then command C to copy. 


Then command V to paste. Under Edit, Transform Flip Horizontal to mirror the selection.


Add a layer mask to the duplicated trees and brush off at 0 hardness the area over the subject and the snow to make it look natural.


Flatten the image once your subject is visible. Then you are going to select the Clone Tool and using the option key, select an area you'd like to use to cover an unwanted area. For example, the cars on the left side of the image. I selected the snow using option and then began to paint over the cars. I did the same thing at the top center of the image with the tree line to cover any leftovers of the homes and make the branches seam together better.


Lastly, I duplicated the image layer and straightened it by using command T and the rotating the image. At this point, now you have a clean slate to work with and you can edit however you like :) In my case, I used saturation vignetting and radial gradients to create lighting effects. I also adjusted color curves, contrast and hue to give it a warmer look. For more info on radial gradient lighting, visit my gradient tutorial!


Have questions or need more help? Leave a comment!

Friday, December 19, 2014

Wednesday, December 17, 2014

Frequency Separation For Beginners

Earlier, I had posted a quick smoothing tutorial to give your portraits an air brushed look. Let's tty something different and leave most of the texture while smoothing out colors and blemishes.

There are a few tools you will need to be familiar with: the clone tool, the patch tool, the spot healing brush, as well as blending modes and layer masking. If you know what all of these are, great, let's move forward.


First, open your image. Then duplicate the layer twice. Rename the first duplicate COLOR and the second TEXTURE, so you know which element you are working on.


Select the Color layer. Then go to Filter, Blur, Gaussian Blur. Add a gaussian blur at about 10-15 pixels.

Next, select the texture layer. Go to Image, Apply Image. Change the Layer to Color, and the Blending to Subtract. Then you will change the scale to either 1 or 2 (you will have to check the image once applied to make sure it's not too harsh and then adjust) and the scale to somewhere between 115-130. Then set the blend mode of the texture layer to linear light (sometimes vivid light works too). A lot of this is trial and error for the specific picture you are working on. Once you have those two layers set, put them in their own group. Toggle the group on and off to make sure that it looks the same as your background layer. Once you had adjusted all the settings so that it really doesn't look like you did anything when you toggle on and off, you are ready to get started.


The first layer to work with is the color layer. You will want to use the clone brush. Adjust the opacity to about half, and the flow to about half as well. You can keep the blend mode at normal if you want, but lighten will make it less harsh. Select an area of your subject's skin, by using the option key, that you like best and use that as your clone to even out the rest of the skin. You may need to go over areas a couple of times, but it's best to start out subtle. Once the skin color looks even, then we can move onto the texture.


Next, select the texture layer. You are going to use the spot healing brush for this part. Using the option key, select a spot relatively close to a scar, more or other blemish. You can then spot heal over the blemish without changing the color of the skin. You will simply change the texture. Go around the skin and remove all of the blemishes this way.


Your finished image should look very even in tone and texture without looking fake. Good luck, remember, a lot of trial and error! Don't be afraid to mix up your settings and see what happens :)


A few more examples

Can be used to retouch faces suffering from  blown out pixels or harsh shading

Or to remove redness and beauty marks

Sometimes I like to go over this version of frequency separation with another version found here that adds an overall smooth texture. Feel free to check it out!

Tuesday, December 16, 2014

Touch Ups

Another thing I can do? Edit. I've got to say I've gotten pretty good at touching photos up to either make them look soft, painterly, or dramatic. I offer these services to other photographers, as well as my own personal clients. For more information, please contact me!

 Before

  
After


 Before

 After

  
 Before

 After
  
 Before

  
After

Before

After

Before

After 

Below are photos that I did not take, but was asked to touch up:


 Before
*photo credit Faith McDougal*

 After

 Before
*photo credit Jill Davis*

After

Before 
*photo credit Lora Humphreys*

After

Before
*photo credit Stacey Laviolette*

After

Before 
*photo credit Hilda Holmes*

After